
MAKING THE GRADE
Toolset
It is very difficult to produce a generic overview without touching specific toolset's per individual piece of equipment. The point is though, that although all the manufacturers have a 'twist on a theme,' they all tend to do the same job in correcting the image. There are only so many ways an image can be adjusted once you understand the techniques. It is and becomes a very personal, creative and subjective job. No two colourists would correct the image(s) the same and it can be quite difficult if asked to correct in the style of insert your favourite colourist here.
Independently it is useful to be aware that the style or ultimate look of an image depends a great deal on the capture of the imagery, as well as the colourist employed. Something to bear in mind is that some characteristics are integral to the film stock, such as the grain structure, exposure latitude or even frame rate used! Also the many different digital camera's available vary between manufacturer's because they all use different capture CCD's - the point is you may either love an image or you don't, again it's a very subjective and personal choice.
The 'look' is what the project is trying to achieve, such as Technicolor, black and white or a bleach bypass. You can often be asked to recreate a look from a particular film, production or ultimately a film stock from the past. I've mentioned that in many cases it may be easier to shoot the same style as the proposed 'look,' however sometimes this is untenable because the materials are no longer available, or they have been changed (through manufacturing advancements) so that the desired look simply cannot be captured anymore using today's available products.
Adjustments
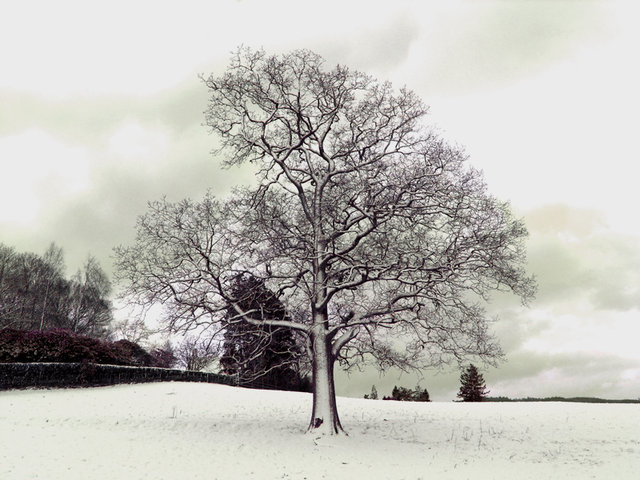
I have taken a single image (one of my own projects), which hopefully will demonstrate how individual and overall adjustments will affect an image. They can be quite dramatic or very simple which will in fact stretch the very dynamic of the image. Again this is highly subjective, my example images may be extreme to suitably demonstrate differences. Remember you will be viewing these images on a different monitor to the one I have used, so they will look slightly different to how I made the final grade and how I interpret them.
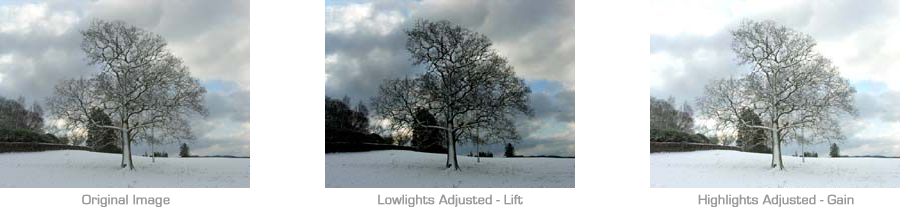
Simply by adjusting the lowlights (lift) or highlights (gain) you can see that the image appears completely different, depending how much detail you require would depend on how much you darken the shadows. Plus if you increase the highlights you will start to blow the highlights and lose everything - of course this may be exactly what you are trying to achieve, but if you particularly wanted a brooding sky then that would be inappropriate. Therefore a balance needs to be found by stretching the dynamic range or attempting to make the image look like the client wants it to.
Windows & Custom Shapes
Alternatively a shape could be applied to allow for the brooding sky to carry to the edges of the frame and change the whole emphasis of the shot - preset shapes are often available such as a square, rectangle, circle or ellipse.
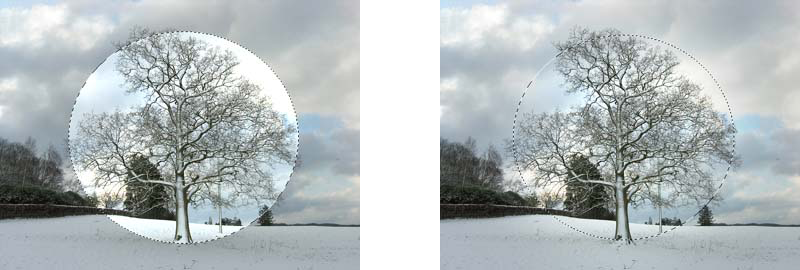
With more advanced tools, a hand drawn shape can be applied to change the image further introducing a far greater depth to the colourist. These shapes can be tracked automatically to the shot if the object is moving through a scene, or keyframed by hand, including individual points of a shape.
All of the shapes can be graded internally and externally, or as a combination of the two. Vignette's can be applied using a shape customised to the desired shape and positioned within the frame, a simple effect to bring focus on an object or viewpoint.
Graduated Softness
During principal photography, filters are attached to the lens by the cinematographer to accentuate certain areas of the captured image or just to balance the image. For example graduated neutral density filters would boost the contrast in the sky while leaving the lower areas of the shot. However these looks can be achieved in the colour correction suite, especially if it is something you are unsure would work at the point of capture, so your options are always open after the event as long as you capture enough dynamic range originally. There are a huge amount of filters which can be employed from warm up filters, that give a warmer look if the images are being captured in dull weather or in the shade to the reverse where cool filters are used to cool off a scene when too warm.
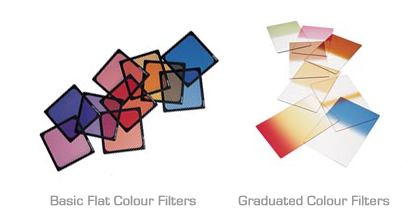
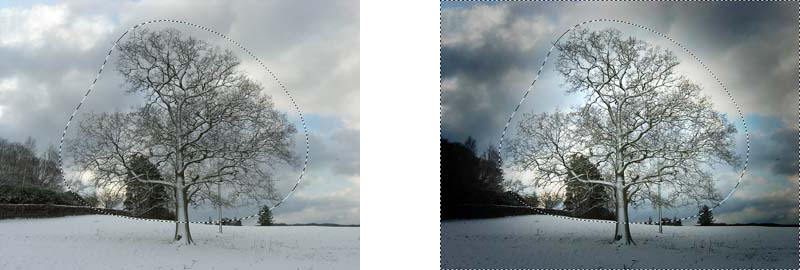
Making sure the shape reaches the edge of the shot, using preset or custom drawn shapes (which you cannot do with filters), you can also create graduated neutral or colour effects. These can be used to simulate many different looks or filters that are sometimes added during principal photography some can soften the image, which ultimately can never be reversed so should be used sparingly some are added to intensify the skyline or tone the image to give a different colour such as a blue graduation filter.
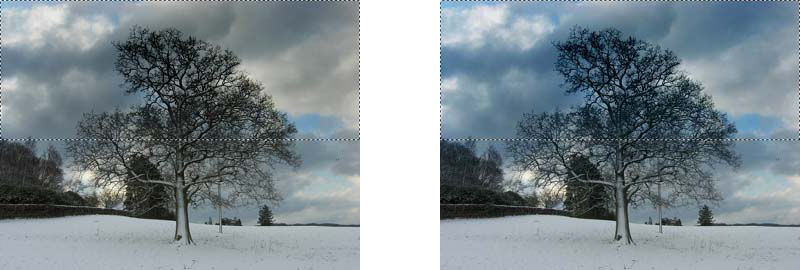
The left image simulates a neutral graduation filter, the right adds a blue graduation filter.
Combining these techniques together - lift, gamma, gain and colour elements hue, saturation plus individual colour values within the imagery, we can simulate and create a multitude of different looks. Where as a great Cinematographer will use a plethora of different filters to acquire the desired warmth or colour from a shot, we as a colourist can simulate or introduce the same sort of styles and looks that we have grown accustomed too.
Ultimately though, we can clearly work the image a lot harder to create a whole new world of colour, styles and looks, pushing the boundaries of what is possible. We can match what has always been possible but now colour correction is pushing the colour frontier creating a new and interesting style that would never have been achievable in camera.
The trick for the colourist is to layer individual corrections to gradually build up a desired look. Some wild and interesting corrections are just not possible within one colour correction layer. Building on top of the first correction can intensify each correction, darkening and thus creating a style for the shot - complicated corrections require many shapes, layers and corrections to build up a convincing style that makes the shot work and ultimately more interesting to the eye. Depending on what system you use, these layering techniques appear seamless but all work together, the interesting thing is that you can constantly rearrange them to change the style, turn off individual layers or cascades within the colour stack, which may or may not work but how do you know unless you try?
WORKFLOW
The workflow between facilities is pretty similar, scanning, conform, dustbusting, FX work, grade and output to deliverable(s) - film negative, tape or digital output, such as D-Cinema or Blu Ray.

Original scanned 35mm frame, untouched, direct from scanner.
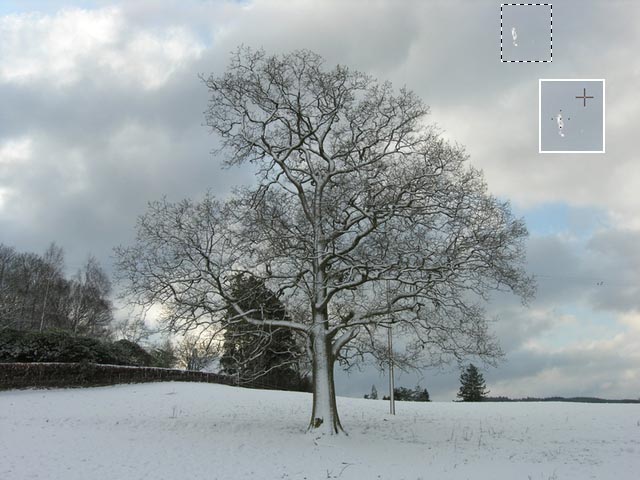
Although dustbusting can take place at any point during the workflow, I personally
believe it is preferable to have finished it before grading commences with the client.

The final effects shot removed the telegraph pole, wires and geese scarer. Plus the
hole in the hedge plugged by cloning a piece.
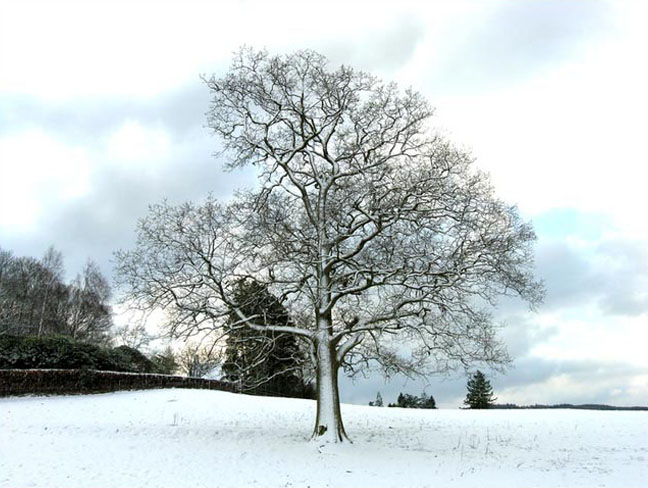
Final signed off shot, with approved grade.
A little bit of grading fun, a twist on a theme, rejected but I liked it.
Did I mention colour was subjective?